How to organize your home with DIY storage solutions
To organize your home with DIY storage solutions, regularly assess your storage areas, use clear labels, and involve family members to maintain an organized and tidy living space.
How to organize your home with DIY storage solutions can transform cluttered spaces into organized havens. Have you ever walked into a room and felt overwhelmed by the mess? Let’s explore how simple DIY techniques can reclaim your space.
Understanding the importance of storage solutions
Understanding the importance of storage solutions is essential for keeping your home organized and functional. Having a well-thought-out storage system can dramatically reduce clutter and enhance your space. Let’s explore how proper storage can transform your home.
The Benefits of Effective Storage
When you implement effective storage solutions, you not only gain space but also improve accessibility to your items. This ensures that everything has its place and can be easily found. A clear space contributes to a clear mind, making your home a more peaceful environment.
Key Reasons to Use Storage Solutions
- Maximize Space: Utilize every inch of your home effectively.
- Reduce Stress: Clutter can be overwhelming; organization eases your mind.
- Improve Aesthetics: A neat space looks more appealing and inviting.
Moreover, integrating DIY storage solutions allows you to customize your space according to your needs. You can create storage that not only fits your items but also matches your home’s decor. Consider using shelves, bins, and boxes that reflect your personal style while serving a practical purpose.
Choosing the right storage solutions can depend on various factors including the size of your home, your specific needs, and the types of items you possess. For example, small apartments benefit from vertical storage, while larger homes may require more diverse solutions including closets and multifunctional furniture.
Getting Started with Your Storage Project
Begin by assessing the areas that need organization. Walk through your space and identify clutter zones where things tend to pile up. This will help you set priorities for your storage solutions. Once identified, you can plan your storage projects accordingly, ensuring you tackle the most problematic areas first.
Incorporating creative DIY storage solutions can make the process enjoyable. You’ll not only organize your space but also take pride in the systems you create yourself, which can lead to a greater sense of accomplishment.
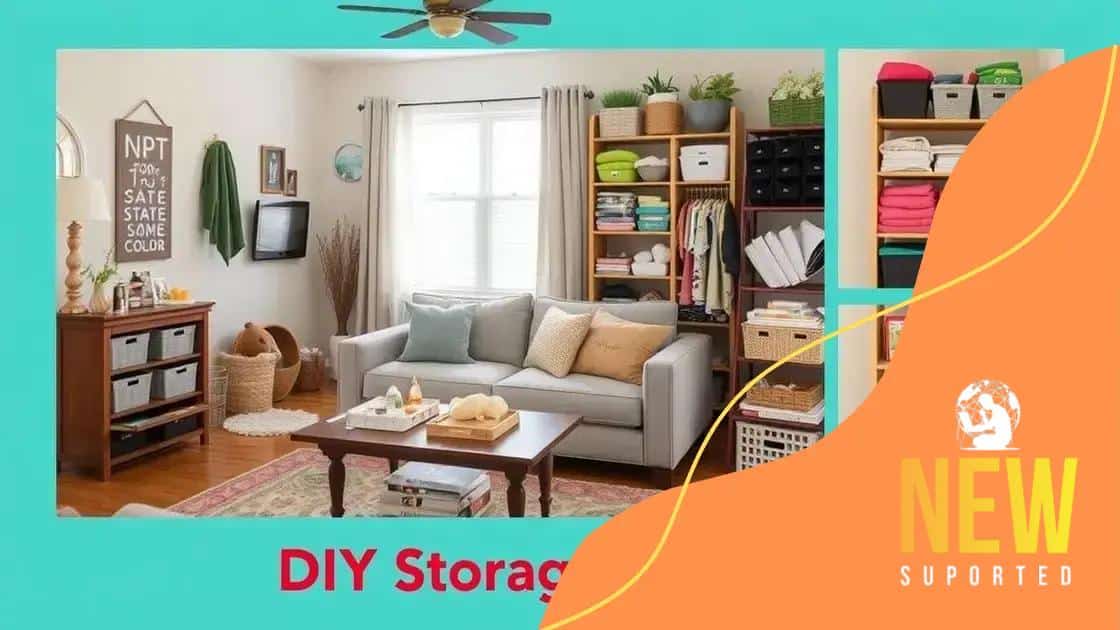
Creative DIY storage ideas for small spaces
Creative DIY storage ideas for small spaces can make a huge difference in how organized your home feels. When you have limited square footage, clever storage solutions help maximize every inch while keeping things tidy and accessible. Let’s delve into some innovative ways to utilize your space.
Utilizing Vertical Space
One of the best ways to make the most of a small area is by going vertical. Installing shelves above furniture can create additional storage without taking up floor space. You can use decorative boxes or bins to organize smaller items, keeping the look cohesive.
- Wall-mounted shelves: Great for books, plants, or décor items.
- Hanging organizers: Perfect for storing accessories or office supplies.
- Over-the-door racks: Utilize the back of doors for additional storage.
Another aspect to consider is multi-functional furniture. This allows you to store items while fulfilling another purpose. For example, a coffee table with drawers or an ottoman that opens can hide away clutter while still serving as usable furniture.
Creating Hidden Storage
Hidden storage is essential in small spaces, where visible clutter can feel overwhelming. Think about how you can create secret spots for your belongings. Under-bed storage is a classic method. Use bins or drawers that can slide under the bed to keep seasonal items or shoes out of sight.
Behind furniture, such as sofas or armchairs, can also be a clever area to stash things. Consider slim storage carts that can slide into tight spaces. This way, you can keep necessities within easy reach without cluttering up your living area.
Repurposing items can also lead to unique DIY storage solutions. Old wooden crates can be stacked to form a trendy bookshelf or used as an open side table. A vintage suitcase could serve as a chic storage box for blankets and throws.
Incorporating Aesthetic Storage Options
When designing your storage, consider aesthetics as well. You can choose colors and materials that complement your home’s décor. For instance, clear containers can blend seamlessly into your design while keeping your items visible. Alternatively, woven baskets add a natural touch while serving as practical storage.
Experimenting with different designs for your storage can spark creativity. By incorporating bright colors or fun patterns, you make storage a stylish part of your space instead of hiding it away. DIY solutions not only help you organize but let you express your personal style.
How to choose the right materials for DIY projects

Choosing the right materials for your DIY projects is crucial for achieving the best results. The materials you select can significantly affect the durability, functionality, and appearance of your finished creation. Let’s explore how to make informed choices when it comes to DIY materials.
Consider the Purpose
When starting a DIY project, the first step is to understand its purpose. Are you building a functional item, such as a storage unit, or a decorative piece? Knowing the intent of your project will guide you in selecting appropriate materials.
- For functional projects: Use durable materials like wood or metal that can withstand wear and tear.
- For decorative projects: Lighter materials like fabric or paper might be more suitable.
This distinction helps you select the right materials that will fulfill the needs of your project while also matching your desired aesthetic.
Assess Material Availability
Another important factor is the availability of materials. Before diving into a project, check local stores or online resources to ensure that you can easily obtain everything you need. Sometimes, finding unique materials can enhance your project while saving you time and hassle.
Consider using recycled or repurposed materials when possible. Items like pallets, old furniture, or upcycled containers can often be transformed into beautiful DIY projects while being cost-effective and environmentally friendly.
Evaluate Budget Constraints
Your budget will also guide your material choices. Determine how much you’re willing to spend before starting your project. It’s possible to achieve stunning results without overspending by comparing prices and seeking alternatives. For example, choosing plywood instead of solid wood can save money without sacrificing quality for many DIY projects.
Additionally, always keep in mind the long-term costs associated with materials. Some cheaper options may wear out faster, ultimately costing you more in replacements.
Consider Aesthetics and Texture
Aesthetics are just as important as functionality. Look for materials that complement your home’s decor and the overall design of your project. Experimenting with textures can also add depth and interest. Mixing smooth and rough materials, or combining high-tech and organic textures can result in unique designs.
Don’t hesitate to incorporate color. Whether through paint or naturally colored materials, thoughtful choices can elevate the visual appeal of your DIY creations.
Step-by-step guide to building your storage solutions
A step-by-step guide to building your storage solutions can make the process easier and more enjoyable. Whether you’re organizing a closet or creating a new shelving unit, having a clear plan is essential. Let’s explore how to effectively build your storage solutions.
Gather Your Materials
Before you begin, gather all the materials you will need. This may include wood, brackets, screws, nails, and tools like a saw, drill, and screwdriver. Be sure to review your design and ensure you have everything prepared. Having all your materials at hand will save you time and keep the project flowing smoothly.
Measure Your Space
Accurate measurements are crucial. Measure the area where you plan to build your storage solution. Note the height, width, and depth of the space to ensure your design fits perfectly. It’s helpful to write down these measurements or even sketch a rough idea on paper.
Design Your Storage Solution
Once you have your measurements, it’s time to design your storage. Think about what you need to store and how accessible you want it to be. Create a layout that includes shelves, bins, or compartments as needed. Planning will help you visualize how to best use your space.
Assemble the Storage Unit
Now it’s time to put everything together. Start by constructing the frame of your storage unit. Secure any panels or boards using screws or nails according to your layout. Make sure everything is level and sturdy to ensure durability.
Finish and Organize
Once assembled, you can paint or stain your storage unit to match your space. This step adds a personal touch and can enhance your home’s aesthetics. After everything is dry, it’s time to organize your items. Place your bins, boxes, or other storage solutions on the shelves, arranging everything in a way that makes sense to you.
As you organize, consider labeling bins or shelves for easy identification. This helps maintain order and makes finding items simple. Following these steps will lead you to create customized storage solutions that fit your needs and make your space more functional.
Maintaining organization with your DIY storage solutions
Maintaining organization with your DIY storage solutions is essential for keeping your space clutter-free and functional. Once you have built your storage units, a strategy for upkeep will help you maximize their effectiveness. Let’s explore some practical tips to stay organized.
Regularly Assess Your Storage
Checking your storage solutions regularly helps keep them organized. Set aside time every few months to review what you have stored. This gives you a chance to discard items you no longer need or use. By decluttering, you can make room for new items and prevent overcrowding.
Create a System for Everything
Developing a systematic approach for your storage can streamline the organization process. Assign a specific place for each type of item. For example, all tools could be kept in one area, while craft supplies are stored in another. Clear labeling on bins and shelves can enhance quick access and visibility.
- Use labels: Clearly label containers and shelves to identify contents easily.
- Group similar items: Organize items by category or frequency of use to make retrieval straightforward.
- Implement color coding: Use designated colors for various items to simplify organization and visual management.
By employing these strategies, you create a more intuitive system that helps everyone in your household find what they need quickly.
Adjust as Necessary
Your storage solutions may need adjustments over time. As your needs change, feel free to rearrange your DIY solutions. This flexibility is one of the benefits of creating your storage. If you find certain items are being used more frequently, consider relocating them to an easily accessible area. Likewise, less commonly used items can be placed out of the way.
Establishing a routine for maintenance is key. Set dates on your calendar to revisit your organization methods. During these check-ins, clean your storage areas and ensure everything is in its assigned spot. A little effort goes a long way in ensuring your DIY storage remains functional.
Involve Family Members
If you share your space with others, involve them in the organization process. Educate everyone on the importance of maintaining order in your DIY storage solutions. Encourage family members to follow the systems you set up, which fosters a collective responsibility for keeping things organized.
When everyone is on board, it creates a tidy environment, reducing stress and making the space enjoyable for everyone. With collaboration, your home can remain a haven of organization.
FAQ – Frequently Asked Questions about DIY Storage Solutions
How can I maintain my DIY storage solutions effectively?
Regularly assess your storage areas, declutter, and use clear labeling systems to ensure everything is organized.
What materials are best for building DIY storage units?
Use durable materials like wood or metal for functionality, and consider recycled items for a sustainable option.
How often should I reorganize my storage solutions?
It’s a good idea to reassess your storage every few months, especially as your needs change.
Can involving family members help with organization?
Yes, involving family members fosters shared responsibility and helps maintain order in your storage solutions.


